As the autumn season approaches, crisp leaves and cooler evenings signal that it is time to transition your home from summer cooling to fall heating. While it is easy to take your home heating system for granted during the warm summer months, turning on a furnace or heat pump that has sat dormant for months without proper preparation can lead to unwanted surprises. A system left unaddressed can suffer from low energy efficiency, unexpected breakdowns on the coldest nights, and even serious safety hazards like carbon monoxide leaks. Taking a proactive approach to autumn heating maintenance ensures your home remains a warm, comfortable sanctuary all season long while keeping energy bills as low as possible.
Preparing your heating setup does not have to be an overwhelming endeavor. By breaking down the process into manageable steps—combining simple hands-on tasks you can handle yourself with timely professional evaluations—you can significantly extend the lifespan of your equipment. Taking the time now to inspect components, clear pathways, and address minor wear and tear will prevent minor issues from turning into costly emergency HVAC repairs later. The following guide provides a comprehensive, room-by-room, and component-by-component roadmap to help you prepare your heating equipment thoroughly before autumn temperatures arrive in earnest.

Test Your Thermostat for Accurate Autumn Temperature Control
Your thermostat serves as the brain of your home’s entire climate control system, and verifying its accuracy early in the autumn is essential. Months of driving the air conditioner can sometimes leave the device out of sync or leave setting schedules ill-suited for colder weather. Start by switching your thermostat setting from “Cool” to “Heat” and raising the target temperature three to five degrees above the current room temperature. You should hear a distinct click, followed shortly by the sound of your system engaging and warm air flowing from the vents within a couple of minutes.
If your thermostat fails to trigger the system, or if the temperature reading seems wildly inaccurate compared to the actual room temperature, simple troubleshooting is in order. Dust and debris can accumulate inside mechanical thermostat housings, interfering with sensors, so carefully removing the cover and dusting the interior with a soft brush can resolve minor glitches. For digital models, replacing the internal batteries annually every fall prevents sudden system shutdowns during a cold snap.
- Switch modes cleanly: Ensure the unit is set entirely to “Heat” rather than “Auto” to prevent conflicting climate commands.
- Replace batteries: Swap out old batteries with fresh alkaline batteries every autumn to avoid screen blackouts.
- Calibrate sensors: Use an accurate digital thermometer placed next to the unit to verify temperature precision.
- Upgrade your tech: Consider installing a programmable or smart thermostat to automate temperature setbacks when you are sleeping or away from home.
If your system still does not respond after replacing the batteries and verifying the settings, internal wiring or relay controls may be compromised. Complex electrical controls within modern heating systems often require specialized diagnostics from skilled heating contractors who can safely evaluate low-voltage lines and control boards. Enlisting qualified expertise ensures your thermostat communicates seamlessly with your heating equipment throughout the chilly months ahead.
Inspect and Replace Air Filters Before the First Cold Snap
One of the simplest yet most critical tasks in autumn heating prep is inspecting and replacing your system’s air filter. Over the summer, your air handler pushed hundreds of thousands of cubic feet of air through the filter, trapping dust, pollen, pet dander, and household debris. When a filter becomes clogged, it severely restricts airflow, forcing the blower motor to work significantly harder to push air through your home. This added resistance increases energy consumption and causes heat to build up inside the furnace cabinet, potentially triggering safety limit switches that shut down the unit completely.
Replacing a dirty filter immediately restores proper airflow, improves indoor air quality, and protects critical internal components like the heat exchanger and blower fan from damaging dust accumulation. Check your filter’s size dimensions printed on its plastic frame, and select a replacement with an appropriate Minimum Efficiency Reporting Value (MERV) rating. While high MERV ratings capture smaller particles, ratings that are too high for your specific equipment can restrict airflow just as severely as a dirty filter. For most standard residential systems, a MERV rating between 8 and 11 provides an optimal balance between air filtration and system efficiency.
Before installing a fresh filter, inspect the filter housing box for any dust build-up or loose fittings that might let unfiltered air bypass the media entirely. Slide the new filter into place, paying close attention to the directional arrows printed on the frame that indicate the correct orientation for airflow toward the blower motor. Marking the replacement date directly on the edge of the filter frame with a permanent marker gives you a quick visual reminder to re-check the filter every 30 to 60 days throughout the high-demand heating season.
Clean and Uncover Supply and Return Vents Throughout the House
Proper airflow throughout your entire living space depends just as much on what happens at the room vents as it does at the furnace itself. Over the summer, it is common for rug placement, heavy furniture, or decorative accents to be adjusted, accidentally blocking floor or wall registers. Take a walk through every room in your house to locate every supply register (where warm air enters) and every return vent (where air is drawn back to the system). Ensure that all supply registers are fully open and completely unblocked by furniture, curtains, or thick carpeting.
Closing off registers in unused rooms is a common misconception that actually harms modern forced-air systems; doing so increases static pressure inside the ductwork, leading to duct leaks and premature motor failure. Additionally, vacuum away any dust, cobwebs, or pet hair that have accumulated on the metal grilles over the summer. Clean vent grilles to ensure that air moves freely without picking up settled dust and blowing it back into your living space when the heat cycles on for the first time.
If you notice significant dust buildup deep inside the register boots or hear rattling noises when air passes through, the internal surfaces of your branch ducts may need attention. Homeowners facing persistent dust issues or uneven heating between rooms frequently reach out to reputable HVAC companies to perform deep duct cleanings and airflow balancing. Professional technicians can measure airflow volume at each register, ensuring that heat is delivered evenly and efficiently across every square foot of your home.

Perform a Thorough Visual Check of the Heating Unit
Before turning your heating equipment on for the season, a detailed visual inspection of the main cabinet and surrounding components is essential. Turn off the electrical power switch located near the furnace or at the main circuit breaker panel before opening any access panels. Inspect the outer cabinet for any signs of physical damage, heavy rust, or water staining, which could indicate internal condensation leaks or flue gas issues. Take time to look closely at wire insulation and connection points, ensuring there are no visible signs of scorching, melting, or rodent damage from the summer months.
If you operate a gas-fired furnace, locate the burner viewing window or remove the door panel to examine the burner assembly. Look for loose rust flakes, soot deposits, or heavy dust buildup around the burner orifices and igniter assembly. Soot and heavy oxidation indicate incomplete combustion, which lowers efficiency and can pose safety risks if left unaddressed over a long winter.
If your visual check reveals heavy corrosion on internal panels, electrical wiring showing signs of overheating, or standing water around the base of the furnace, refrain from running the system. Issues involving combustion chamber integrity or high-voltage components are best addressed by the best HVAC contractors who carry the diagnostic tools necessary to pinpoint root causes safely. Fixing minor physical vulnerabilities during early autumn prevents major system failures when winter weather sets in.
Clean the Area Surrounding Your Heating Unit for Safety
The space surrounding your furnace or boiler often becomes a dumping ground for seasonal items like summer sports gear, lawn equipment, paint cans, and cardboard storage boxes over the warmer months. However, maintaining clear space around your heating equipment is vital for both fire safety and system performance. Furnaces and boilers require a continuous supply of fresh air for proper fuel combustion and draft exhaust. Storing combustible materials too close to a burner cabinet creates a severe fire risk and can starve the unit of oxygen, leading to elevated carbon monoxide production.
Clear a zone of at least three feet around all sides of your heating unit, water heater, and associated piping. Remove all paper products, boxes, chemical cleaners, gasoline containers, and paints from the mechanical room entirely. Sweep the floor around the equipment to clear away lint, dust, and sawdust that could easily be drawn into the burner chamber when the system ignites.
Keeping this area clean and unobstructed also ensures that service technicians have clear, safe access to the unit when performing annual tune-ups or sudden repairs. A clutter-free mechanical room allows for quick visual checks during the season, making it easy to spot new fluid leaks, soot accumulation, or unusual vibrations right away. Establishing a clean environment around your heating appliances is one of the easiest, zero-cost steps you can take to protect your home this fall.
Test Safety Controls and Detectors in the Home
A well-maintained heating system must run safely, making the arrival of autumn the perfect opportunity to verify all household safety mechanisms. Fuel-burning appliances—including gas furnaces, oil boilers, and wood stoves—produce carbon monoxide (CO) as a byproduct of combustion. Carbon monoxide is an odorless, colorless, and tasteless gas that can be lethal if allowed to accumulate indoors due to a cracked heat exchanger or blocked flue pipe. Test every carbon monoxide detector and smoke alarm in your home using their built-in test buttons, and replace their batteries promptly.
In addition to room alarms, your heating unit itself relies on several built-in safety controls designed to shut the system down if dangerous conditions arise. Flame sensors, high-limit switches, and rollout switches automatically cut off fuel flow if temperatures spike or if flames spill outside the burner chamber. While homeowners can verify that these components look physically intact, testing their electrical functionality requires specific procedures and tools.
- Test CO detectors: Press the test button on every unit on each level of your home, replacing batteries immediately if signals are weak.
- Check smoke alarms: Ensure smoke detectors inside bedrooms and hallways function properly and are under ten years old.
- Verify gas shut-off valves: Locate the manual fuel shut-off valve on your supply line and ensure it turns smoothly without binding.
- Inspect door safety switches: Ensure the blower door panel depresses the internal safety switch tightly when closed.
Homeowners seeking comprehensive verification of these internal fail-safes often book local HVAC services for pre-season safety checks. Trained technicians use specialized testing equipment to simulate fault conditions, ensuring that fuel valves close instantly if a flame fails or if the cabinet overheats. Confirming that all home and system safety controls are fully operational offers irreplaceable peace of mind before you run your heater continuously.
Bleed Air from Radiators and Check Hydronic Systems
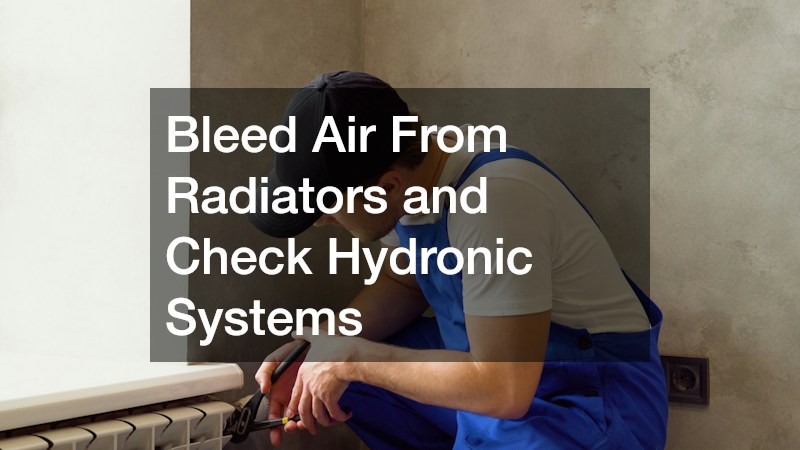
If your home relies on a hot water (hydronic) boiler system with radiators or baseboard heaters rather than a forced-air furnace, autumn prep involves a unique set of tasks. Over months of disuse, air bubbles can become trapped inside the water pipes and radiator units. Because air rises to the top of the system, these air pockets prevent hot water from circulating fully through the radiator, leaving the top half of the unit cold while the bottom stays warm. This reduces heat output and forces your boiler to run longer to satisfy the thermostat.
To bleed trapped air, turn your heating system on and allow the radiators to warm up. Take a radiator key or flathead screwdriver, hold a small cup or rag under the valve located at the top corner of the radiator, and slowly turn the key counterclockwise. You will hear a hissing sound as trapped air escapes; as soon as a steady trickle of water starts flowing out, turn the key clockwise to seal the valve shut tightly. Repeat this process for every radiator in your home, working from the lowest floor to the highest.
After bleeding air from your radiators, inspect the central boiler unit and surrounding piping for any evidence of slow water leaks or corrosion around fittings. Check the system’s combination pressure and temperature gauge; residential hot water boilers typically operate between 12 and 15 pounds per square inch (PSI) when cold, and slightly higher when fully heated. If your pressure is unusually low or if you notice dripping water around relief valves, consult a local HVAC company to evaluate your expansion tank, automatic fill valve, and zone controls before winter begins.
Inspect and Seal Leaky Air Ductwork in Exposed Areas
In homes with forced-air heating systems, warm air travels from the furnace through a complex network of metal or flexible ductwork before reaching your living space. Over time, household settling, thermal expansion, and aging tape can cause duct joints to separate, creating gaps that leak conditioned air into unheated spaces like basements, attics, and crawlspaces. According to the U.S. Department of Energy, the average home loses 20 to 30 percent of the air moving through its duct system to leaks, leading to high utility bills and cold spots in distant rooms.
Begin your inspection in accessible, unconditioned areas like unfinished basements or attics where duct runs are fully exposed. Turn your furnace fan on and run your hands along the seams, joints, and connections of the metal ductwork to feel for escaping air. Look for loose metal connections, torn flexible ducts, or ancient cloth duct tape that has dried up and unraveled from joints.
Sealing these exposed leaks with specialized materials restores proper pressure and ensures that the heat you pay for actually reaches your living areas. Avoid standard silver duct tape, which quickly degrades under heat fluctuations; instead, use paintable mastic duct sealant or heavy-duty foil tape rated for HVAC applications. For hard-to-reach duct sections buried inside walls or ceiling cavities, homeowners often hire technicians skilled in heating repairs to perform pressure tests and internal duct sealing, dramatically improving efficiency and room-to-room comfort.
Inspect Chimneys, Flues, and Exhaust Vents for Blockages
Fuel-burning heating systems must vent their combustion byproducts—including carbon monoxide, water vapor, and sulfur dioxide—safely outside the home. Autumn is the crucial time to inspect all chimney flues, metal exhaust pipes, and PVC vent lines for physical blockages or degradation that occurred over the spring and summer. Birds, squirrels, and insects frequently build nests inside vent pipes, while falling leaves and twigs can choke exhaust terminations on roofs or side walls.
Walk around the exterior of your home and visually inspect all vent terminations protruding through the roof or exterior side walls. Ensure that mesh rodent screens on PVC direct-vent lines are clean and intake pipes are entirely free of leaves, spiderwebs, or landscaping overgrowth. Inside the house, examine the metal flue pipe running from your furnace or boiler to the chimney; look for heavy rust scale, loose connection joints, or white powdery deposits (efflorescence) that indicate corrosive exhaust gas condensation.
For traditional masonry chimneys serving furnaces or wood stoves, examine the brickwork and mortar joints for cracks or flaking brick surfaces on the exterior. Inside, a flashlight can help you look up into the cleanout door to check for fallen brick fragments, soot buildup, or creosote deposits. If you spot heavy soot accumulation, structural cracking, or suspect an internal flue obstruction, it is crucial to consult established Heating companies or certified chimney sweeps immediately. Clearing vent blockages restores safe draft conditions, preventing dangerous combustion fumes from backing up into your living quarters.

Schedule a Comprehensive Professional Tune-Up Early
While homeowner maintenance tasks like replacing filters, clearing vents, and testing thermostats go a long way toward protecting your system, they cannot replace the technical precision of a professional seasonal tune-up. Heating equipment involves complex electrical circuits, high-pressure gas lines, calibrated combustion processes, and delicate safety sensors that require specialized diagnostic equipment to evaluate correctly. Booking a professional inspection early in the autumn—well before the first major cold spell triggers a rush of emergency service calls—ensures your system receives meticulous, unhurried attention.
During a professional tune-up, a qualified technician performs a comprehensive series of checks that go far beyond surface cleaning. They measure electrical current draw on motors, test ignition sequences, inspect heat exchangers with specialized cameras for microscopic hairline cracks, and perform combustion analyzer tests to measure fuel efficiency and carbon monoxide outputs precisely.
Investing in an annual heating inspection not only prevents sudden breakdowns and reduces monthly utility bills, but it also satisfies manufacturer warranty requirements, which often demand proof of regular professional maintenance to keep warranty coverage valid. Taking the time to research local HVAC contractors with verified credentials, proper licensing, and positive customer reviews ensures your heating system is serviced by a capable professional. Early autumn tune-ups allow ample time to order any necessary replacement parts without leaving your family shivering in a cold house when winter officially arrives.
Preparing your heating system for autumn is one of the smartest investments of time and effort you can make as a homeowner. By methodically working through simple maintenance tasks—such as replacing air filters, clearing room vents, testing thermostats, and sealing exposed ductwork—you lay the groundwork for a safe, highly efficient heating season. Complementing your hands-on efforts with a professional evaluation ensures that hidden electrical faults, combustion issues, and mechanical wear are caught and corrected long before extreme weather puts your equipment to the test.
Taking action early in the season keeps your energy costs down, protects your home’s indoor air quality, and prevents the stress and expense of sudden heating failures on freezing winter nights. As the autumn leaves begin to drop and the cool air sets in, you can rest easy knowing your heating system is fully prepared to deliver safe, reliable warmth to your family all season long.